When the Grid Goes Dark, We Don’t Panic We Execute
Listen, Winter Storm Fern is about to roll through North Texas(in late January 2026) and drop temperatures to 6-12°F with wind chills hitting -6°F, most people are NOT ready for this. Even after 2021. Even after all the warnings. But here’s what separates the people who just survive from the people who dominate: preparation meets execution when chaos hits.
I’m Bobby Franklin, the North Texas Market Insider. While everyone else is panicking about frozen pipes and dark houses, I’m thinking five steps ahead about what this means for property values, what buyers need to know, and how smart homeowners turn winter disasters into strategic advantages.
This isn’t your typical “stay warm during power outages” article. This is your complete North Texas winter storm survival and property protection system, because when you understand what’s actually happening to your home during a freeze, you can protect both your family AND your biggest investment simultaneously.
Let’s get into it.
The Brutal Math: How Fast Does Your North Texas Home Become Uninhabitable?
Here’s the reality nobody wants to talk about: most North Texas homes weren’t built for sustained extreme cold. We’re designed for 100°F summers, not single-digit winters with no power.
Your home loses livable heat in approximately 8-12 hours after the power cuts out. That’s your window under normal winter conditions. But when we’re talking about the kind of cold Winter Storm Fern is bringing? That window shrinks to maybe 4-6 hours before things get genuinely dangerous.
Several factors determine whether your home holds heat or bleeds it out like a sieve:
Outdoor temperature and wind conditions – Wind is the silent killer. Every 1 mph of wind drops the effective insulation value of your walls. That’s why wind chill matters even for structures.
Home insulation and age – If you’re in one of those beautiful historic Waxahachie homes built in the 1920s-1940s, we need to have a real conversation about insulation. Many Ellis County properties were built before modern energy codes, which means gorgeous character but terrible thermal performance.
Home size and layout – Bigger isn’t better during a freeze. A 4,000 square foot open-concept home will lose heat catastrophically faster than a 1,500 square foot traditional layout with actual doors between rooms.
Construction quality and air sealing – This is where newer isn’t always better either. I’ve seen brand-new construction with terrible air sealing around windows and doors, while some older homes that have been properly renovated are actually superior.
Here’s your critical temperature timeline every North Texas homeowner needs burned into their brain:
- 65°F inside: Still comfortable, but you’re losing ground
- 55°F inside: Time to implement your warm room strategy immediately
- 50°F inside: Your pipes are entering the danger zone
- 40°F inside: Pipe freezing becomes highly probable within hours
- 32°F inside: You’re now dealing with structural damage timelines
Once you hit that 50-degree mark inside your home, you’re in a race against time. This is when smart homeowners execute their preparation plan, not when they start thinking about what they should have done.
The First 30 Minutes: Your Emergency Response Protocol
When the power goes out during freezing weather, you have roughly 30 minutes to execute your initial response before conditions start degrading rapidly. This is your “golden hour” (well, golden half-hour) where clear thinking and immediate action make all the difference.
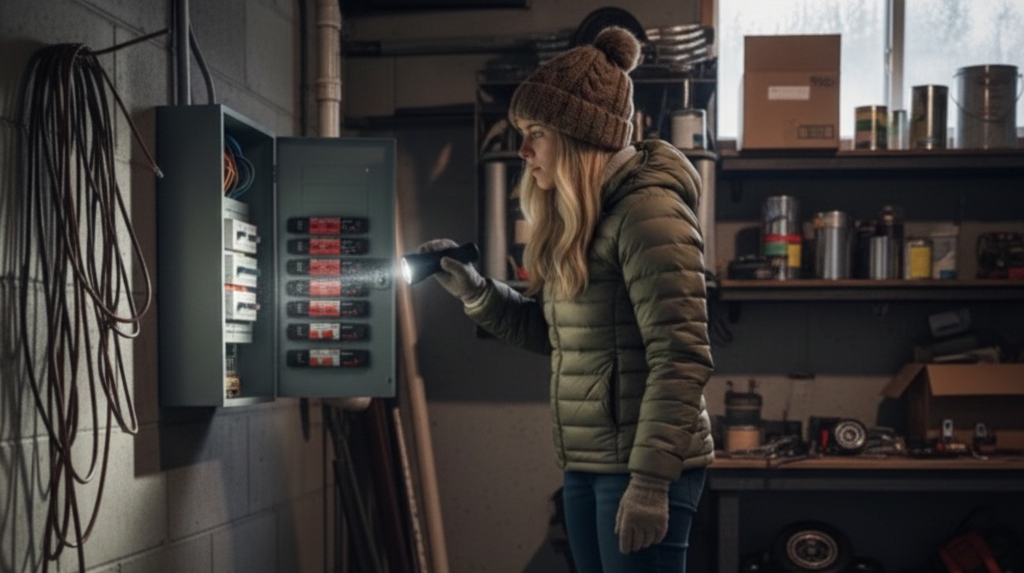
Step 1: Confirm and Report (First 5 Minutes)
Don’t assume it’s a grid failure until you’ve verified:
- Check your main breaker panel – Sometimes it’s something simple. I’ve seen people bundled up in blankets calling Oncor when they just needed to flip their main breaker back on.
- Verify it’s an outage – Check neighbors’ homes. If their lights are on, your problem is localized and potentially fixable faster.
- Report immediately to your utility provider – For most of Ellis County and DFW, that’s Oncor. Don’t wait. Every minute counts in the restoration queue.
- Check the Oncor outage map – This tells you if your outage is known and gives you estimated restoration times. Reality check: during major storms, those estimates are wildly optimistic, but at least you know you’re in the system. Oncor Outage Map
- Call 211 – This is your direct line to warming center information and emergency resources across North Texas. Save this number in your phone right now. Not later. Now.
Step 2: Eliminate Immediate Safety Threats (Next 10 Minutes)
Listen very carefully to this part, because people die every single freeze from making these exact mistakes:
NEVER use these indoors under any circumstances:
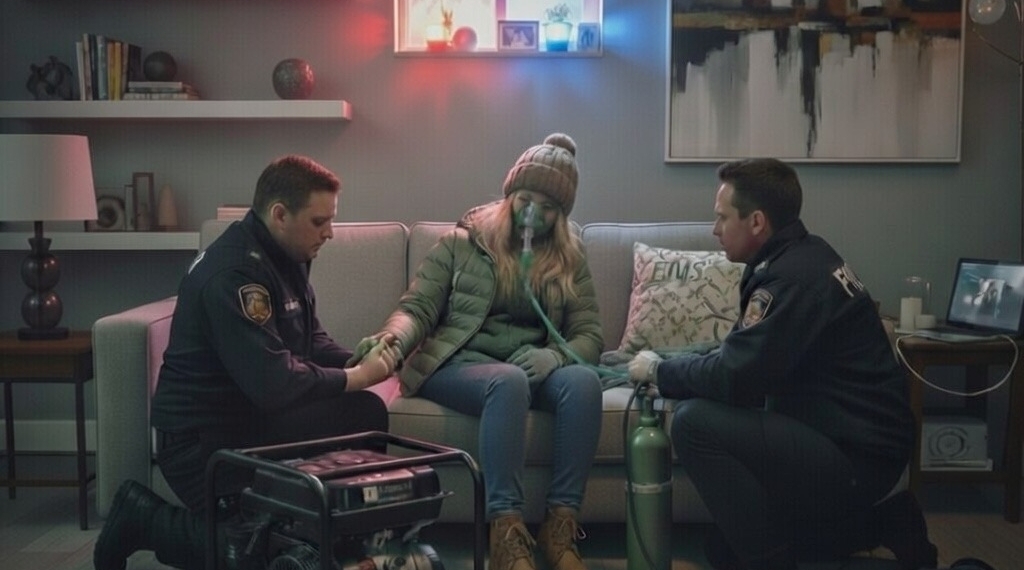
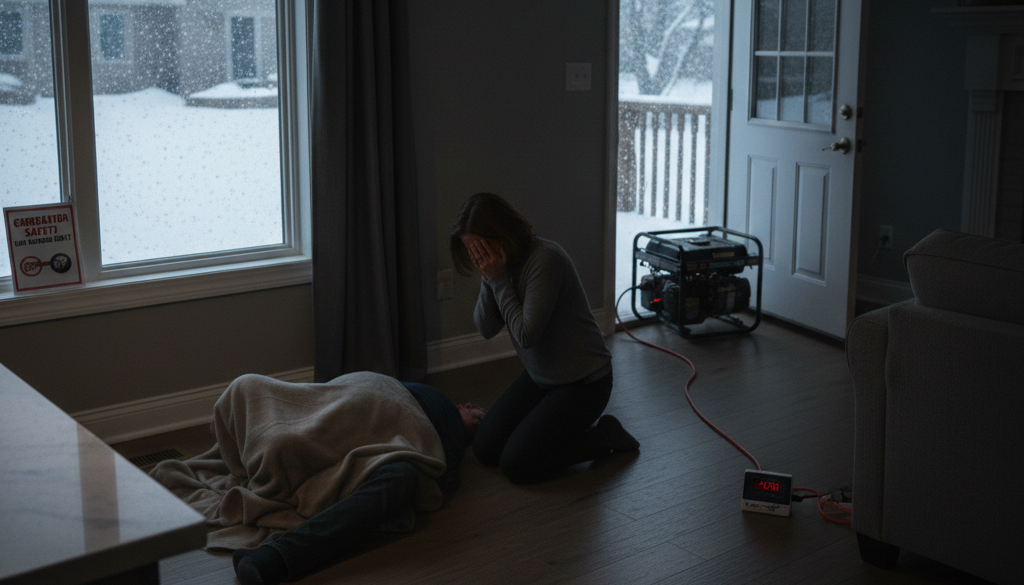
- Portable generators – I don’t care how cold it is. I don’t care if you “crack a window.” Generators produce carbon monoxide at levels that will kill you and your family in minutes. The ONLY acceptable location is outdoors, at least 20 feet from your home, with exhaust pointed away from all windows and doors. Not in your garage. Not in your covered patio. Not in your shed. Outdoors. Period.
- Charcoal grills – Every freeze, somebody thinks “just for a little bit” and ends up in an ambulance or worse. Carbon monoxide from charcoal is colorless, odorless, and absolutely lethal.
- Camp stoves and portable gas equipment – Same principle. These are designed for outdoor use with unlimited ventilation.
Here’s what carbon monoxide poisoning looks like, because recognition saves lives:
Early symptoms (these come on fast):
- Headache and dizziness
- Nausea and vomiting
- Confusion and disorientation
- Weakness and shortness of breath
Advanced symptoms (this is immediately life-threatening):
- Loss of consciousness
- Irregular or stopped breathing
- Seizures
If anyone in your home shows these symptoms during a power outage, get everyone outside immediately and call 911. Don’t try to figure out the source. Don’t try to ventilate the house first. Get out, then call for help.
Make sure you have working carbon monoxide detectors with fresh batteries on every level of your home. This is non-negotiable equipment.
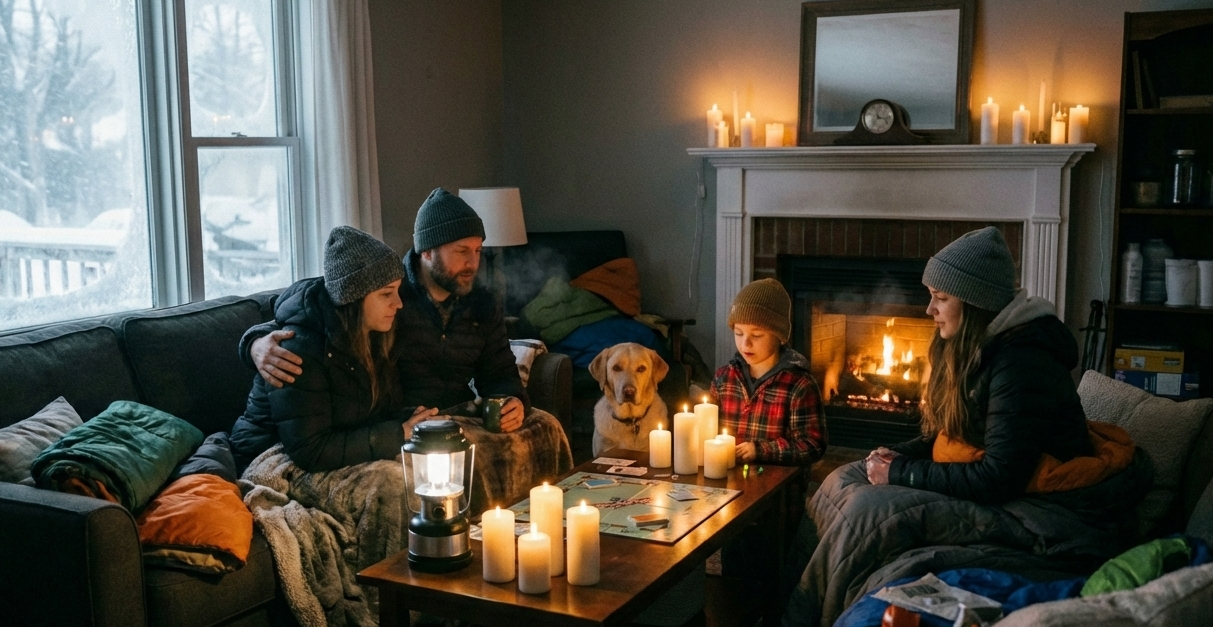
Step 3: Create Your Warm Room Strategy (Final 15 Minutes)
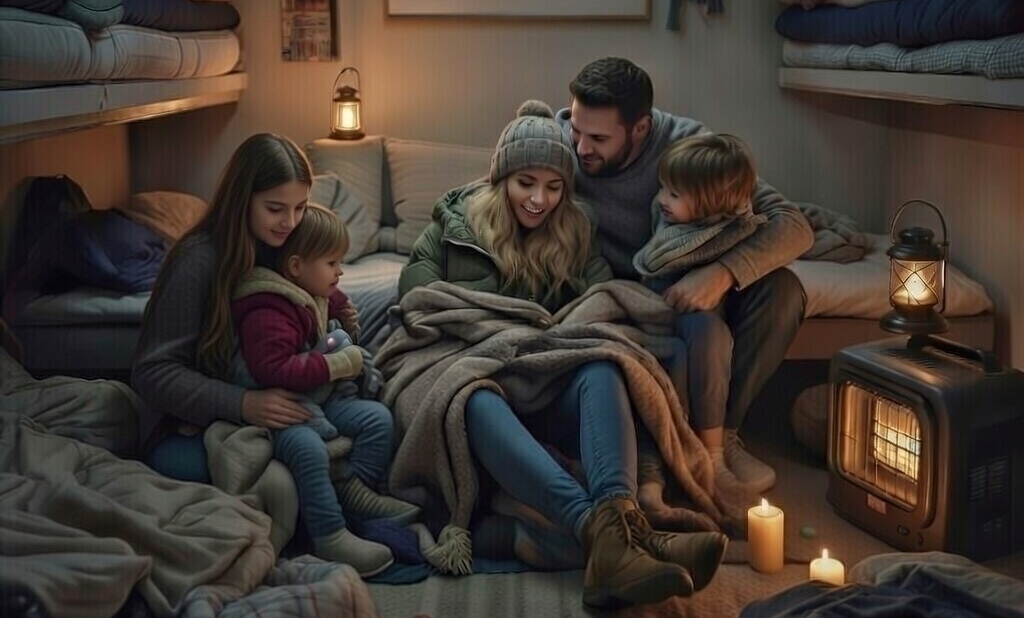
Here’s where strategic thinking separates comfortable survival from miserable endurance.
The rookie mistake is trying to heat your entire house. That’s impossible without power and dangerous with most alternative heat sources. The professional move is creating one strategically selected warm room where your family consolidates.
Choose your warm room based on these criteria:
Southern exposure if possible – Even in winter, southern-facing rooms receive maximum sunlight during the day. This passive solar heating is free thermal energy you’d be foolish not to capture.
Smaller room over larger – Physics doesn’t care about your preference for spaciousness. Smaller volumes retain heat exponentially better. That guest bedroom is probably better than your master suite.
Interior over exterior walls – Every exterior wall is a heat sink pulling warmth out of your home. Rooms with minimal exterior wall exposure lose heat slower.
Fewer windows – Windows are thermal disasters even with modern double-pane construction. Triple-pane windows are better, but even those are heat loss points compared to insulated walls.
Practical access to bathroom – You still need to deal with basic human needs. Choose a warm room that doesn’t require walking through the entire frozen house to reach a bathroom.
Once you’ve selected your warm room, maximize its thermal performance:
Close and seal all other rooms – Shut every door in your house except to your warm room. Roll towels or blankets and stuff them under every door to prevent drafts. You’re creating a smaller thermal envelope inside your larger home.
Window treatment strategy – During daylight hours in sunny weather, open curtains on south-facing windows to capture solar heat. As soon as the sun sets or conditions turn cloudy, close everything and cover windows with blankets, sleeping bags, or cardboard if necessary. Every layer of air space between the window and your room interior is additional insulation.
Gather all humans and pets – Body heat is significant. An average adult generates about 100 watts of heat constantly. That’s equivalent to a light bulb. Four people in one room generate 400 watts of continuous heat just from existing. Don’t waste this free energy by spreading out through the house.
The tent-inside-a-room technique – Here’s an advanced move most people don’t consider: set up a camping tent inside your warm room. This creates a microclimate within your already-protected space. The temperature inside that tent can easily be 10-15 degrees warmer than the surrounding room just from body heat and reduced air volume. I’ve used this technique personally, and it works remarkably well.
Layering Strategy: The Science of Staying Warm Without Electricity

Most people layer clothing completely wrong, which is why they’re still cold even when wearing multiple layers. Understanding the actual thermal principles makes all the difference.
Base Layer: Moisture Management (Next to Skin)
Your base layer has one job: move moisture away from your skin while providing initial insulation.
What works:
- Synthetic moisture-wicking fabrics (polypropylene, polyester)
- Merino wool (the absolute gold standard)
- Silk (underrated and highly effective)
What fails:
- Cotton – I cannot emphasize this enough. Cotton is called “death cloth” in wilderness survival for a reason. When cotton gets damp from sweat (which happens constantly from normal body moisture), it loses about 90% of its insulating value and actively pulls heat away from your body through evaporative cooling. This is the exact opposite of what you want.
The mantra is: “Cotton kills.” Avoid it entirely in winter emergencies.
Middle Layer: Insulation (Trapping Dead Air)
Your middle layer captures and holds warm air close to your body. The more dead air space you can create without adding excessive bulk, the better your insulation.
What works:
- Fleece (lightweight and effective)
- Wool sweaters (heavy but extremely effective even when damp)
- Down or synthetic insulated jackets (maximum warmth-to-weight ratio)
- Multiple thin layers beat one thick layer – This is counterintuitive, but three thin sweaters will keep you warmer than one thick coat because of the dead air spaces between each layer
Pro technique: Don’t wear your layers so tight that you compress the insulation. You want a little looseness that allows air space between layers while still trapping that air close to your body.
Outer Layer: Wind and Moisture Protection
Your outer layer blocks wind and prevents moisture from reaching your insulation layers.
What works:
- Windbreaker or shell jacket
- Heavy jacket or coat
- Even a large trash bag with holes for head and arms works in desperate situations
Critical Areas: Don’t Neglect Your Extremities
Here’s where most people fail in their layering strategy: they focus on their core and forget that massive heat loss occurs from your head, hands, and feet.
Head coverage:
- You lose approximately 7-10% of total body heat through your head (the old “50% through your head” stat is a myth, but 7-10% is still significant)
- Wear a warm hat even indoors once your home drops below 60°F
- Consider a balaclava or neck gaiter for extreme cold
Hand protection:
- Mittens are superior to gloves because they keep fingers together, sharing warmth
- Layer thin liner gloves under heavier mittens for maximum protection
- Your hands have high surface area relative to volume, making them vulnerable to rapid heat loss
Foot insulation:
- Wool socks (multiple pairs if needed)
- Avoid tight-fitting socks that restrict blood flow
- Keep feet elevated off cold floors using sleeping pads, yoga mats, or even cardboard
The Water Bottle Heat Hack: Localized Warming That Actually Works
If you have any way to safely heat water (gas stove with manual ignition, outdoor camping stove), hot water bottles become your secret weapon.
How to use them effectively:
Pre-bed warming – Fill hot water bottles (or well-sealed containers like Nalgene bottles) and place them in your bed 30-45 minutes before sleeping. This pre-heats your sleeping space so you’re not climbing into an ice box.
Core body warming – Place a hot water bottle against your torso inside your jacket. Your core temperature drives your overall comfort, and keeping your core warm is more effective than warming extremities first.
Foot warming – Place hot water bottles at your feet while sitting or lying down. Cold feet trigger whole-body cold perception even when your core is adequately warm.
Safety considerations:
- Never use boiling water (it can melt bottles or cause burns if they leak)
- Wrap bottles in towels or cloth to prevent direct skin contact
- Check bottles periodically for leaks
- Hot water bottles stay warm for 4-6 hours typically
Protecting Your Pipes: The $27,000 Mistake You Can Prevent
During the 2021 Texas freeze, hundreds of thousands of homeowners filed insurance claims for burst pipes. The average claim was between $5,000-$27,000, but I personally know people who had claims exceeding $100,000 when you factor in water damage to flooring, drywall, furniture, and extended hotel stays.
Let’s make sure you’re not one of those statistics.
Understanding Pipe Freeze Physics
Pipes don’t freeze because it’s cold outside. Pipes freeze because the water inside them reaches 32°F and remains there long enough to form ice. That seems obvious, but understanding this principle changes your strategy.
Critical factors:
Outdoor temperature – Pipes typically start freezing when outdoor temperatures remain at or below 20°F for several hours. But this varies significantly based on:
Pipe location – Pipes in these locations are highest risk:
- Exterior walls (especially north-facing)
- Unheated attics
- Crawl spaces
- Garages
- Under kitchen or bathroom sinks on exterior walls
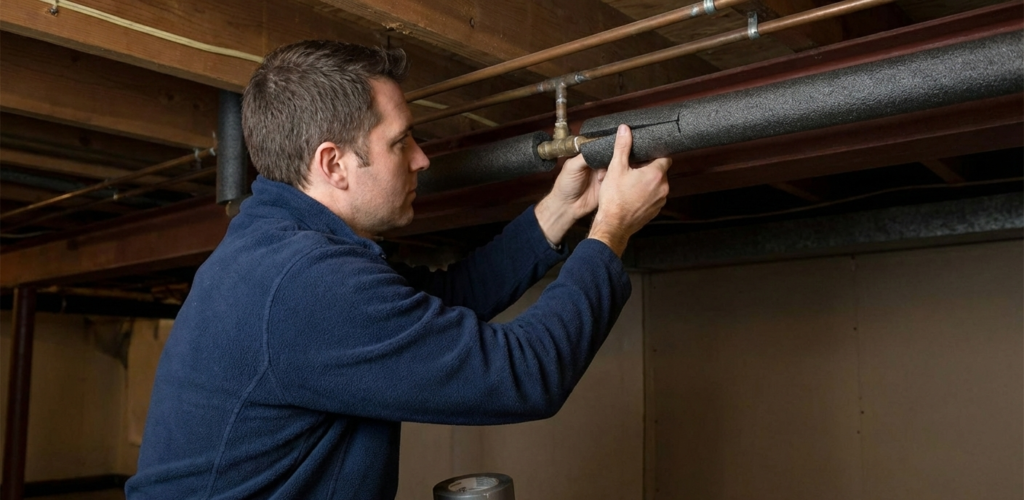
Insulation – Uninsulated pipes freeze much faster than insulated ones. Even minimal insulation dramatically extends the time before freezing.
Water flow – Moving water is much harder to freeze than static water. This is why dripping faucets works as a prevention strategy.
Indoor temperature – Once your indoor temperature drops below 32°F, even pipes inside your heated envelope are at risk.
Emergency Pipe Protection Protocol
When the power goes out and temperatures are freezing, implement these measures immediately:
Let faucets drip (strategic selection):
Don’t just randomly drip every faucet in your house. Target the vulnerable ones:
- Faucets on exterior walls
- Faucets in unheated spaces
- Faucets at the end of long pipe runs
- Both hot and cold water (this keeps both supply lines moving)
How much flow? A pencil-width stream is sufficient. You want visible flow, not just drops. Yes, this “wastes” water, but burst pipe water damage “wastes” thousands of gallons plus your home’s interior. Easy math.
Important consideration: During some emergency situations, municipal water systems may request residents conserve water. Monitor local guidance from your city. However, in most cases, preventing pipe bursts is considered essential use.
Open cabinet doors:
Every cabinet door under a sink along an exterior wall should be standing open. This allows warmer room air to circulate around the pipes inside the cabinet. This seemingly trivial step prevents thousands of pipe freeze incidents every winter.
Know your main water shutoff:
Right now, before any emergency, go locate your main water shutoff valve. It’s typically:
- Near where the main water line enters your home
- In a basement if you have one
- In a utility closet
- Sometimes in the garage
- Occasionally in a crawl space access
Practice turning it off and on. Many shutoff valves haven’t been operated in years and require significant force or may be partially frozen. You don’t want to discover this during an emergency.
Why this matters: If a pipe bursts, every second counts. A single burst pipe can discharge several gallons per minute. If you’re away from home or asleep, that could be thousands of gallons before you discover it. Knowing how to immediately shut off the main water supply can mean the difference between minor damage and catastrophic flooding.
If you must abandon your home:
If conditions become unsafe and you need to evacuate to a warming center or relative’s home:
- Turn off the main water supply
- Open all faucets (this drains remaining water and gives expanding ice somewhere to go)
- Flush toilets to drain tanks and bowls as much as possible
- Open cabinet doors under sinks
- Leave interior doors open throughout the house
This approach won’t prevent all damage, but it minimizes it significantly.
What to Do When Pipes Freeze (Not If, When)
How to identify frozen pipes:
- Reduced or no water flow from faucets
- Frost visible on exposed pipes
- Strange sounds when you turn on faucets (gurgling, banging)
- Bulging pipes (this means ice expansion is occurring)
Safe thawing procedure:
- Keep the faucet open – As ice melts, water and steam need somewhere to go. An open faucet allows this.
- Apply gentle heat using approved methods:
- Electric heating pad wrapped around the pipe
- Hair dryer pointed at the frozen section (keep moving it, don’t concentrate heat in one spot)
- Towels soaked in hot water and wrapped around the pipe
- Space heater placed nearby (never unattended)
- Work from the faucet toward the frozen area – This allows melting water to flow out through the open faucet rather than being trapped behind ice.
- NEVER use these heat sources:
- Blowtorch
- Propane torch
- Open flame of any kind
- Excessive heat that could damage pipe materials
When to call a professional immediately:
- You can’t locate the frozen section
- The frozen area isn’t accessible
- You hear water running but can’t find the source (likely frozen pipe has burst inside wall)
- Multiple pipes are frozen simultaneously
- You suspect the freeze is in your main line
Plumbers during winter storms are in extreme demand and charge premium emergency rates. But that’s still cheaper than the water damage from a burst pipe you attempted to thaw incorrectly.
for further reading on what to do when your pipes freeze radar comprehensive guide: The January 2026 Arctic Blast: Your Complete North Texas Home Protection Strategy
Food Safety: Your Refrigerator Timeline and Cold Weather Storage Strategy
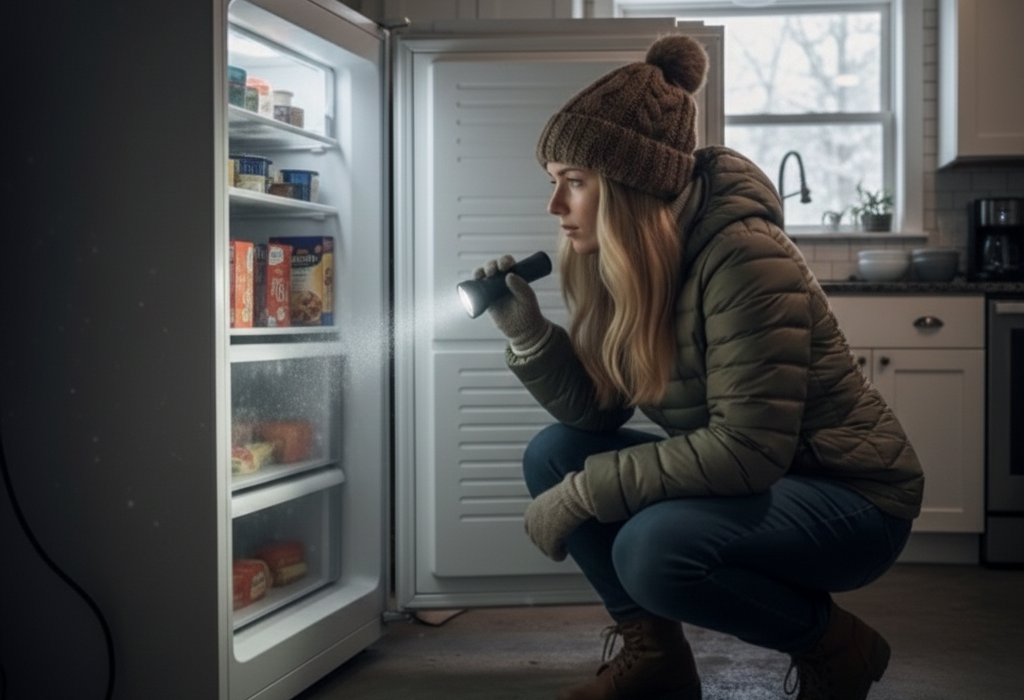
One of the strange silver linings of winter power outages is that cold temperatures outside can actually help you preserve food. But you need to understand the timelines and strategies.
Refrigerator and Freezer Emergency Timelines
Refrigerator (door kept closed):
- Maintains safe food temperature (below 40°F) for approximately 4 hours
- After 4 hours, food in the temperature danger zone (40-140°F) begins bacterial growth that can cause foodborne illness
- Perishables like meat, dairy, eggs, and leftovers are highest risk
Full freezer (door kept closed):
- Maintains freezing temperature for approximately 48 hours
- Food remains frozen if it stays at 0°F or below
- A full freezer retains cold much better than a partially full one (less air space to warm up)
Half-full freezer (door kept closed):
- Maintains freezing temperature for approximately 24 hours
- Consider filling empty space with bags of ice or frozen water bottles to extend this timeline
The door discipline principle:
Every time you open your refrigerator or freezer, you lose significant cold air and introduce warm, humid air that must be cooled down again. During power outages:
- Plan ahead before opening – Know exactly what you need before you open the door
- Grab and close quickly – No browsing or standing with the door open
- Limit openings to absolute necessity – Every opening costs you time on your cold retention timeline
The Post-Power Food Safety Decision
When power returns, you need to make rapid decisions about what’s safe and what’s not:
Safe to keep:
- Frozen food that still has ice crystals or feels frozen solid
- Frozen food that remained at 40°F or below (use appliance thermometer to check)
- Refrigerated items that stayed below 40°F throughout the outage
Unsafe – must discard:
- Raw meat, poultry, seafood that has been above 40°F for more than 2 hours
- Cooked leftovers that have been in the temperature danger zone
- Dairy products, eggs that have been warm
- Any food with questionable odor, color, or texture
When in doubt, throw it out. Food poisoning is miserable, potentially dangerous, and completely avoidable by making conservative decisions about food safety. The cost of replacing questionable food is far less than medical treatment for foodborne illness.
Winter Emergency Food Storage Hack
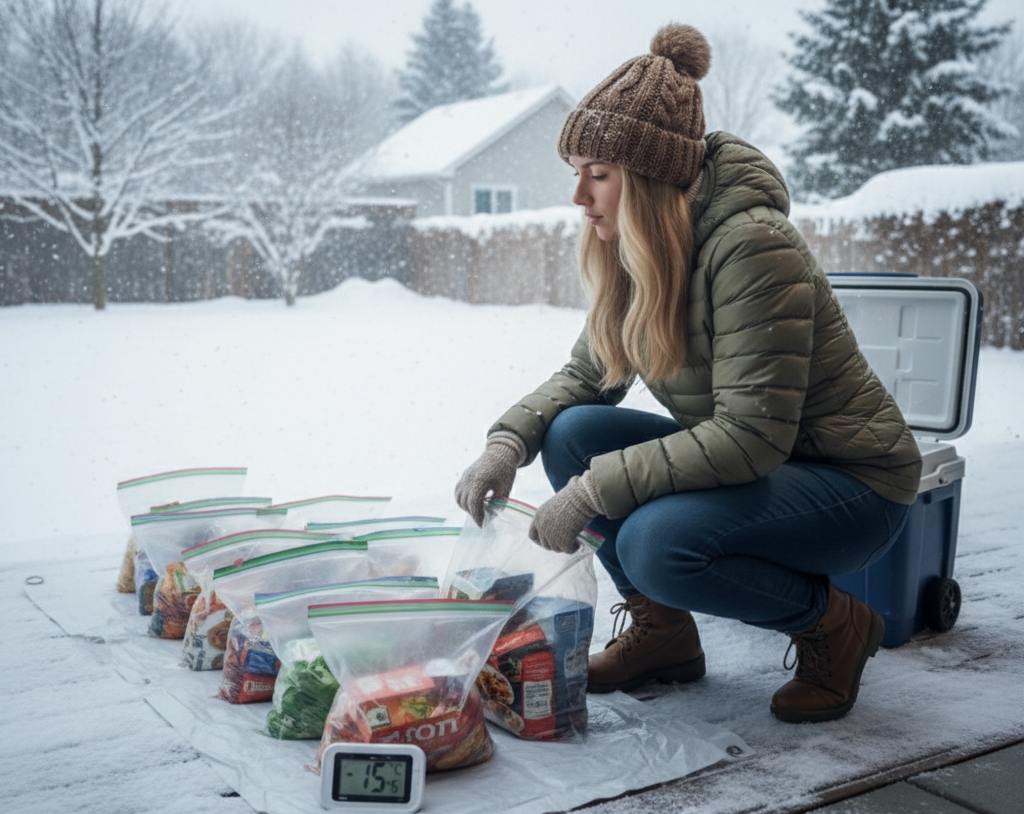
When outdoor temperatures are consistently below freezing, you have access to nature’s refrigerator:
How to use outdoor cold storage safely:
- Use sealed, waterproof containers – Ziplock bags inside plastic containers work well
- Protect from animals – Place containers in secure locations animals can’t access (not just on your back porch)
- Monitor temperatures – If temperatures rise above freezing, bring food back inside to proper cold storage or cook/consume it
- Label containers clearly – Know what you stored and when
- Place in shaded areas – Direct sunlight can create hot spots even in cold weather
What works well for outdoor storage:
- Refrigerated items that need to stay cold but not frozen
- Frozen foods when temps are consistently below 20°F
- Beverages
- Foods in sealed packages
What should NOT be stored outdoors:
- Foods that could spoil if temperatures fluctuate
- Items animals might be attracted to
- Anything not in animal-proof containers
Pre-Storm Food Preparation Strategy
Smart homeowners prepare food storage before the storm hits:
Freeze containers of water:
- Fill empty milk jugs, plastic bottles, or Tupperware with water and freeze solid
- These become thermal mass in your freezer (helps keep temperature down)
- As they melt, they provide drinking water
- Can be moved to refrigerator to extend cold retention there
Prepare frozen meals:
- Cook and freeze complete meals before storm predictions
- These are easier to reheat with alternative cooking methods
- They add thermal mass to your freezer
Stock non-perishable food:
- Canned goods with manual can opener
- Peanut butter, crackers, protein bars
- Dried fruits and nuts
- Cereal and shelf-stable milk
- Items requiring no refrigeration or cooking
Recognizing Life-Threatening Cold Emergencies: Hypothermia and Frostbite
This is the section that literally saves lives, so pay close attention.
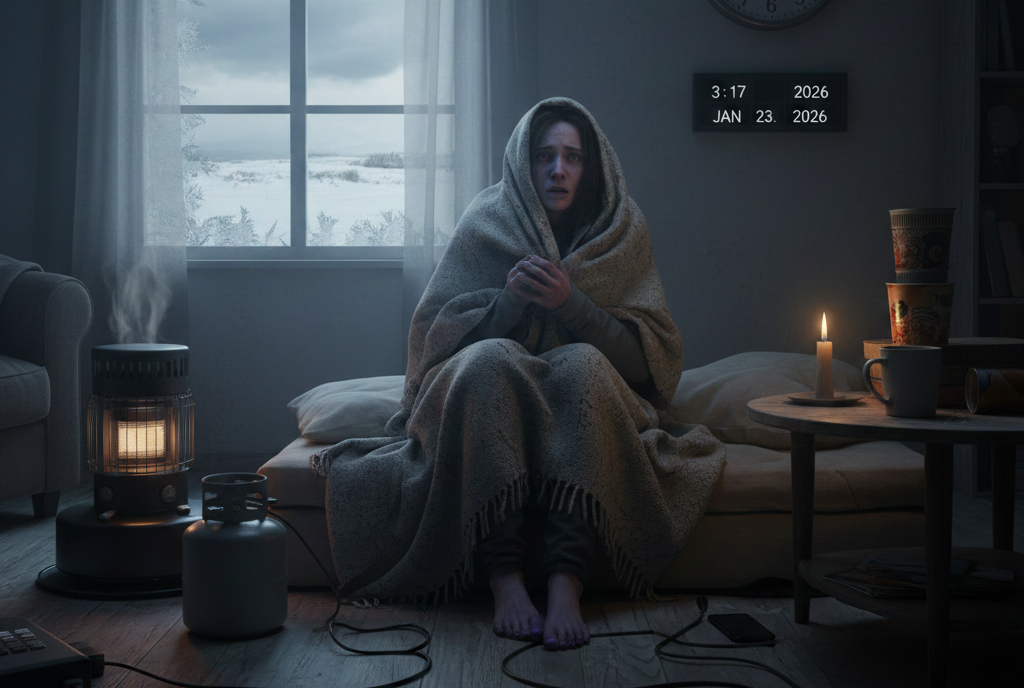
Hypothermia: When Your Body Can’t Maintain Core Temperature
Hypothermia occurs when your body loses heat faster than it can produce it, and your core body temperature drops below 95°F. Hypothermia can kill you inside your own home during a power outage. It’s not just an outdoor wilderness problem.
Risk factors that increase vulnerability:
- Young children and elderly individuals
- People with reduced mobility
- Chronic illnesses (especially cardiovascular disease)
- Medication that affects temperature regulation
- Alcohol consumption (dilates blood vessels, increasing heat loss)
- Inadequate clothing or wet clothing
Progressive hypothermia symptoms:
Mild hypothermia (core temp 90-95°F):
- Shivering (body’s attempt to generate heat)
- Confusion, difficulty concentrating
- Loss of coordination, stumbling
- Slurred speech or mumbling
- Memory problems
- Fumbling hands, difficulty with fine motor tasks
Moderate hypothermia (core temp 82-90°F):
- Shivering stops (this is a BAD sign, not an improvement)
- Extreme confusion, irrational behavior
- Severe coordination loss
- Slowed breathing and heart rate
- Drowsiness, apathy
- May try to remove clothing (paradoxical undressing – brain malfunction)
Severe hypothermia (core temp below 82°F):
- Unconsciousness
- Shallow breathing or stopped breathing
- Weak pulse or no detectable pulse
- Dilated pupils
- Skin appears blue or puffy
Emergency response for hypothermia:
CALL 911 IMMEDIATELY if:
- Person is unconscious or semi-conscious
- Breathing is slow, shallow, or absent
- Core temperature is below 95°F
- Person is confused, drowsy, or irrational
While waiting for emergency services:
- Move to warmth – Get the person to your warm room or any protected area immediately
- Remove wet clothing – Wet clothing accelerates heat loss dramatically. Replace with dry layers even if they’re not ideal.
- Warm the core first – Focus on warming:
- Chest
- Neck
- Head
- Groin area Use dry blankets, sleeping bags, hot water bottles (wrapped in towels), or skin-to-skin contact with another person.
- DO NOT:
- Rub or massage the arms and legs (this can force cold blood back to the heart and cause cardiac arrest)
- Apply direct heat like heating pads or heat lamps to extremities
- Give alcohol (it dilates blood vessels and accelerates heat loss)
- Give anything by mouth if person is not fully conscious
- If person is conscious and can swallow:
- Offer warm (not hot) sweet beverages
- NO alcohol or caffeine
- Warm soup or food can help
Handle hypothermia victims gently – Rough handling or sudden movements can trigger cardiac arrest in severe hypothermia cases.
Frostbite: Frozen Tissue Damage
Frostbite is the freezing of body tissue, most commonly affecting:
- Fingers and toes
- Nose
- Ears
- Cheeks
- Chin
Frostbite severity stages:
Frostnip (early stage, reversible):
- Pale or red skin
- Numbness
- Prickling sensation
- No permanent damage if treated promptly
Superficial frostbite:
- Skin appears white, waxy, or grayish-yellow
- Skin feels firm but tissue beneath is still soft
- Blisters may form after rewarming
- Stinging, burning, or throbbing sensations
Deep frostbite:
- Affected area is completely numb
- Skin appears white, blue, or gray-black
- Tissue feels hard and frozen throughout
- Large blisters filled with blood may form
- Loss of function in affected area
- Tissue damage may be permanent
Proper frostbite treatment:
- Get to warm environment immediately
- Remove wet clothing and jewelry – Swelling will occur during rewarming
- DO NOT walk on frostbitten feet if avoidable – This can cause severe additional damage
- Rewarm affected areas properly:
- Use warm (NOT hot) water: 99-104°F
- Immerse affected area for 15-30 minutes
- Water should feel comfortably warm to unaffected areas
- Continue until area is soft and feeling returns
- DO NOT:
- Use direct heat (fireplace, heating pad, stove, car heater)
- Rub or massage frostbitten areas
- Walk on frostbitten feet
- Rewarm if there’s any chance of refreezing (more damage)
- Break blisters
- After rewarming:
- Gently dry and wrap in sterile bandages
- Place gauze between frostbitten fingers or toes
- Elevate affected area to reduce swelling
- Take over-the-counter pain medication (ibuprofen works well)
Seek immediate medical care for:
- Moderate to severe frostbite
- Large areas affected
- Face, nose, or ears affected
- Any frostbite in children
- Signs of infection after rewarming
Prevention is infinitely better than treatment:
- Dress in layers with wind protection
- Cover all exposed skin when going outside in extreme cold
- Keep moving to maintain circulation
- Come inside periodically to warm up
- Stay hydrated (dehydration increases frostbite risk)
Where to Go When Your Home Becomes Unsafe: North Texas Warming Centers
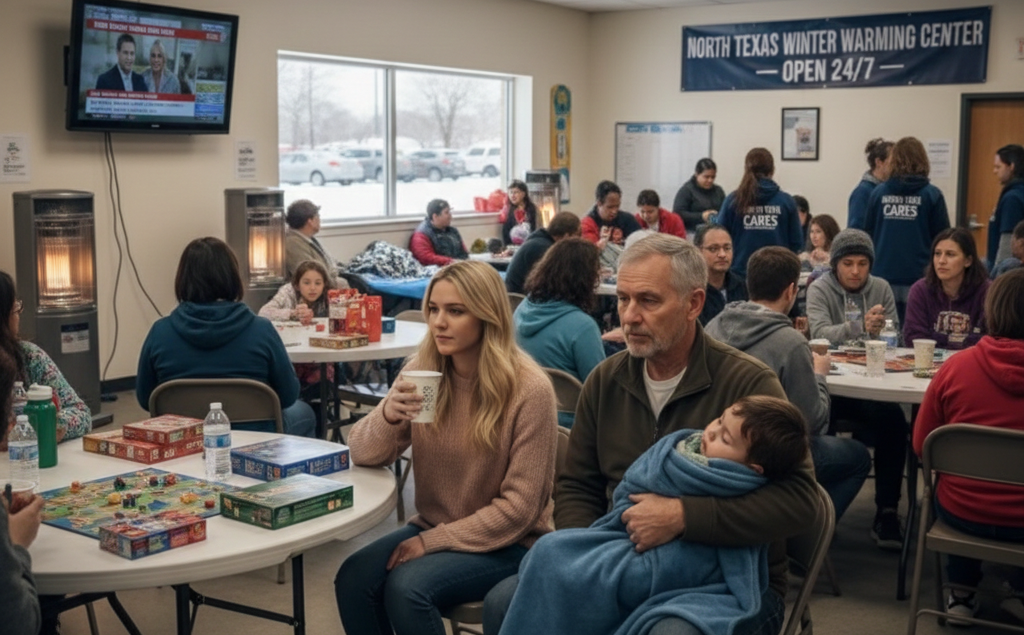
Sometimes the smartest move is recognizing when you need to leave your home and access professional warming facilities.
When to Evacuate to a Warming Center
Consider leaving your home if:
- Indoor temperature drops below 50°F and continues falling
- You cannot maintain adequate warmth with available resources
- You have vulnerable family members (elderly, very young children, medically fragile)
- Your home has carbon monoxide concerns
- Pipes have burst and you have active flooding
- You lack adequate food or water
- Medical equipment requires power you don’t have
Don’t wait until it becomes an absolute emergency. Traveling in severe winter weather is dangerous. Leave while you still can do so relatively safely.
Finding Warming Centers in Real Time
Warming center locations and availability change based on current conditions. Don’t rely on old information.
Best resources for current warming center information:
Call 211:
- Available 24/7
- Provides real-time information on warming centers in your specific area
- Can connect you to emergency services
- Free from any phone
Check local government websites:
- City of Dallas Emergency Management
- Ellis County Emergency Management
- Tarrant County Emergency Management
- Your specific city website (Waxahachie, Midlothian, Red Oak, etc.)
Monitor local news stations:
- NBC 5, CBS 11, ABC 8, FOX 4 DFW
- Local news websites maintain updated warming center lists during winter emergencies
Social media:
- Follow your city and county emergency management accounts
- Local news stations post frequent updates
- Community groups often share information about warming centers
During Winter Storm Fern, North Texas warming centers included:
- Police and fire stations
- Churches and faith-based organizations
- Salvation Army locations
- Community centers
- Public libraries
- Recreation centers
- Some schools
Before traveling to a warming center:
- Call ahead to confirm they’re open – Status changes frequently
- Confirm they have capacity – Some centers reach maximum occupancy
- Ask about pet policies – Some accept pets, others don’t
- Check if they provide meals – Plan accordingly
- Ask about required identification or documentation
What to bring:
- Photo identification
- Medications and medical supplies
- Important documents in waterproof container
- Phone charger and power bank
- Change of warm, dry clothing
- Personal hygiene items
- Blanket and pillow if possible
- Food and water if available
- Items to occupy children
Essential Emergency Supply Checklist: What Every North Texas Home Actually Needs
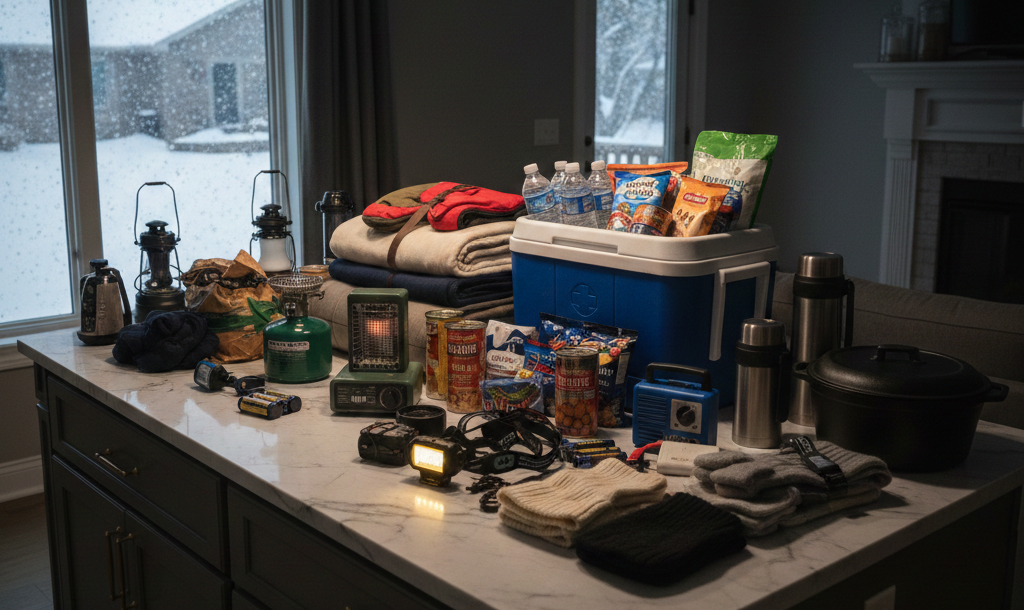
Most emergency preparedness lists are overwhelming and impractical. This is the streamlined version focused on what you’ll actually use during a North Texas winter power outage.
Power and Light (Realistic Needs)
LED flashlights (2-3 per household):
- Why LED? Battery life measured in dozens of hours instead of minutes
- Keep one in bedroom, one in kitchen, one in main living area
- Test monthly and replace batteries annually
Extra batteries:
- Focus on AA and AAA (standardized sizes)
- Store in cool, dry location
- Rotate stock annually
Battery-powered or hand-crank radio:
- Your connection to emergency broadcasts when internet and phone service fail
- NOAA Weather Radio capability is valuable
- Many models include phone charging capability
Power banks for phones:
- Minimum 10,000 mAh capacity
- Keep fully charged (check monthly)
- One per adult in household minimum
Consider solar-powered chargers:
- Not essential, but valuable backup
- Works even during extended outages
- Relatively inexpensive insurance policy
Avoid open-flame candles when possible:
- Fire risk during chaos is real
- If you must use candles, use stable holders on non-flammable surfaces
- Never leave unattended
- Keep away from children, pets, curtains, and anything flammable
Water and Food (3-Day Minimum)
Water storage:
- 1 gallon per person per day minimum
- 3-day minimum = 3 gallons per person
- Family of 4 = 12 gallons minimum
- Don’t forget pets (add 1 gallon per day for large dogs)
Water storage options:
- Commercially bottled water (easiest, no maintenance)
- Clean plastic containers (juice bottles, soda bottles work)
- Water bricks or stackable containers (organized storage)
Food selection criteria:
- No refrigeration required
- Minimal or no cooking required
- Long shelf life (check expiration dates annually)
- Foods your family will actually eat (don’t stock things nobody likes)
Practical food stockpile:
- Canned goods (proteins, vegetables, fruits, soups)
- Peanut butter and jelly
- Crackers and granola bars
- Dried fruits, nuts, trail mix
- Cereal and shelf-stable milk
- Protein or meal replacement bars
- Baby food if needed
- Pet food
Essential tools:
- Manual can opener (not electric) – You’d be surprised how many people discover this need at the worst time
- Disposable plates, cups, utensils
- Plastic bags for waste disposal
Warmth and Shelter
Blankets and sleeping bags:
- One per person minimum
- Consider sleeping bags rated for 20°F or lower
- Store compressed in waterproof bags until needed
Emergency mylar blankets (space blankets):
- Compact, inexpensive, surprisingly effective
- Reflects body heat back toward you
- Keep several on hand (family pack)
Cold-weather clothing:
- Thermal underwear (top and bottom)
- Wool socks (multiple pairs)
- Knit hats that cover ears
- Gloves or preferably mittens
- Scarves or neck gaiters
- Heavy coat
Hand and foot warmers:
- Disposable chemical heat packs
- Last 6-10 hours typically
- Valuable for targeted warming
- Stock a box of 20-30 packs
Medical and Hygiene
First aid kit basics:
- Adhesive bandages (various sizes)
- Gauze pads and adhesive tape
- Antiseptic wipes and antibiotic ointment
- Pain relievers (acetaminophen, ibuprofen)
- Tweezers, scissors
- Thermometer
- Prescription medications (30-day supply minimum)
Personal hygiene items:
- Toilet paper (extra supply)
- Baby wipes (useful even without babies – substitute for showering)
- Hand sanitizer
- Feminine hygiene products
- Diapers if needed
- Soap and shampoo
- Toothbrushes and toothpaste
Prescription medication strategy:
- Never let prescriptions get below 7-day supply
- Attempt to maintain 30-day supply when possible
- Keep medications in waterproof, portable container
- Include written list of medications, dosages, and prescribing physicians
Important Documents (Waterproof Container)
Essential paperwork to have accessible:
Insurance information:
- Homeowner’s insurance policy and agent contact
- Health insurance cards
- Auto insurance
Property documents:
- Copy of home deed or closing documents
- Mortgage information and lender contact
- Rent agreement if applicable
Identification:
- Driver’s licenses or ID cards (copies)
- Birth certificates (copies)
- Social Security cards (copies)
- Passports (copies)
Medical information:
- Prescription lists with dosages
- Medical conditions and allergies
- Emergency contacts
- Physician contact information
Financial information:
- Bank account numbers
- Credit card contacts for fraud reporting
- Insurance claim contact numbers
Store originals in fireproof safe or bank safety deposit box. Keep waterproof copies in your emergency supply kit.
Tools and Safety Equipment
Carbon monoxide detectors:
- Battery-powered or battery-backed models required
- One per level of your home minimum
- Test monthly, replace batteries at daylight saving time changes
- Replace entire units per manufacturer recommendations (usually 5-7 years)
Smoke alarms:
- Fresh batteries (test monthly)
- Interconnected system is ideal but not essential
- One in each bedroom and hallway leading to bedrooms
Basic tools:
- Adjustable wrench or pliers (for turning off utilities)
- Screwdrivers (flathead and Phillips)
- Duct tape (fixes everything temporarily)
- Plastic sheeting (for emergency window or roof repairs)
- Work gloves
Emergency lighting:
- Glow sticks (safe, no fire risk, kids love them)
- LED camping lanterns
- Headlamps (hands-free lighting is incredibly useful)
Generator Safety: The Rules That Prevent Deaths
If you own or are considering a portable generator, understanding proper usage isn’t optional, it’s literally life or death.
Every winter storm, people die from generator-related carbon monoxide poisoning. Every single time. Don’t be a statistic.
Non-Negotiable Generator Placement Rules
Generators must be operated:
- Outdoors only – No exceptions
- At least 20 feet from your home – Not 10 feet, not 15 feet, minimum 20 feet
- Away from all doors, windows, and vents – CO can infiltrate through any opening
- With exhaust directed away from structures – Both your home and neighbors’ homes
Generators must NEVER be operated:
- Inside your home
- In your garage (even with door open)
- In your carport or covered patio
- In your shed or outbuilding
- In any partially enclosed space
People think “cracking a window” or “opening the garage door” provides sufficient ventilation. It doesn’t. Portable generators produce carbon monoxide at concentrations that can kill within minutes in enclosed or partially enclosed spaces.
NEVER:
- Plug generator into wall outlet (“back-feeding”)
- Connect generator directly to your home’s electrical panel without transfer switch
- This creates lethal hazards for you, your family, and utility workers attempting to restore power
Weather protection:
- Keep generator dry (electrocution risk)
- Never operate in rain or snow without proper cover
- Use tent-style generator covers (allow airflow while shedding water)
- Ensure adequate ventilation even with cover
Refueling safety:
- Turn off generator and let cool before refueling
- Gasoline vapor ignites easily on hot engine components
- Refuel outdoors only
- Store fuel in approved containers away from living spaces
- Never store fuel inside your home
Carbon Monoxide Detection and Response
Detector placement:
- One on each level of your home
- One near sleeping areas
- One in room adjacent to generator operation (outside)
If CO alarm sounds:
- Get everyone outside immediately
- Don’t investigate the source
- Call 911 from outside
- Don’t reenter until emergency responders clear the home
Never ignore or disable CO alarms. If your detector goes off frequently, you have a dangerous CO source that needs immediate professional attention.
Your Market Intelligence Source for North Texas Real Estate
If you’re considering buying, selling, or investing in North Texas real estate and want guidance from someone who understands both market dynamics AND practical property management, including winter weather resilience, let’s talk.
I’m Bobby Franklin, and I specialize in helping Ellis County and DFW metroplex clients make informed real estate decisions based on comprehensive market intelligence and practical property knowledge.
My focus isn’t just showing houses or closing deals. My focus is providing the strategic insight you need to make decisions that protect both your family and your investment through every season—including North Texas winters.
Whether you’re:
- A first-time buyer trying to understand home systems and maintenance needs
- A current homeowner wondering if your property has winter-related issues affecting value
- An out-of-state buyer relocating to North Texas and unfamiliar with local conditions
- An investor evaluating properties for rental or renovation potential
I provide the market intelligence and practical guidance that helps you succeed in North Texas real estate.
Want to discuss how winter resilience affects property values in your target neighborhood? Wondering if your current home needs upgrades before listing? Curious about the real-world implications of previous freeze damage on a property you’re considering?
Let’s talk strategy.
Bobby Franklin, REALTOR®
Legacy Realty Group – Leslie Majors Team
📲 214-228-0003 | northtexasmarketinsider.com
This article provides general information about winter emergency preparedness and should not be considered a substitute for professional advice. Consult appropriate professionals (licensed electricians, plumbers, HVAC technicians, emergency management personnel, and medical providers) for specific guidance related to your situation. Real estate information reflects market conditions at time of publication and may change.